📌 JWT 동작 원리
▸ MyFilter3.java
public class MyFilter3 implements Filter {
@Override
public void doFilter(ServletRequest request, ServletResponse response, FilterChain chain) throws IOException, ServletException {
HttpServletRequest req = (HttpServletRequest) request;
HttpServletResponse res = (HttpServletResponse) response;
if(req.getMethod().equals("POST")){
String headerAuth = req.getHeader("Authorization");
if(headerAuth.equals("token")){
chain.doFilter(req,res);
}else{
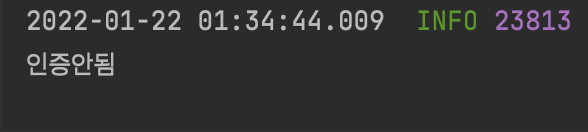
System.out.println("인증안됨");
}
}
}
}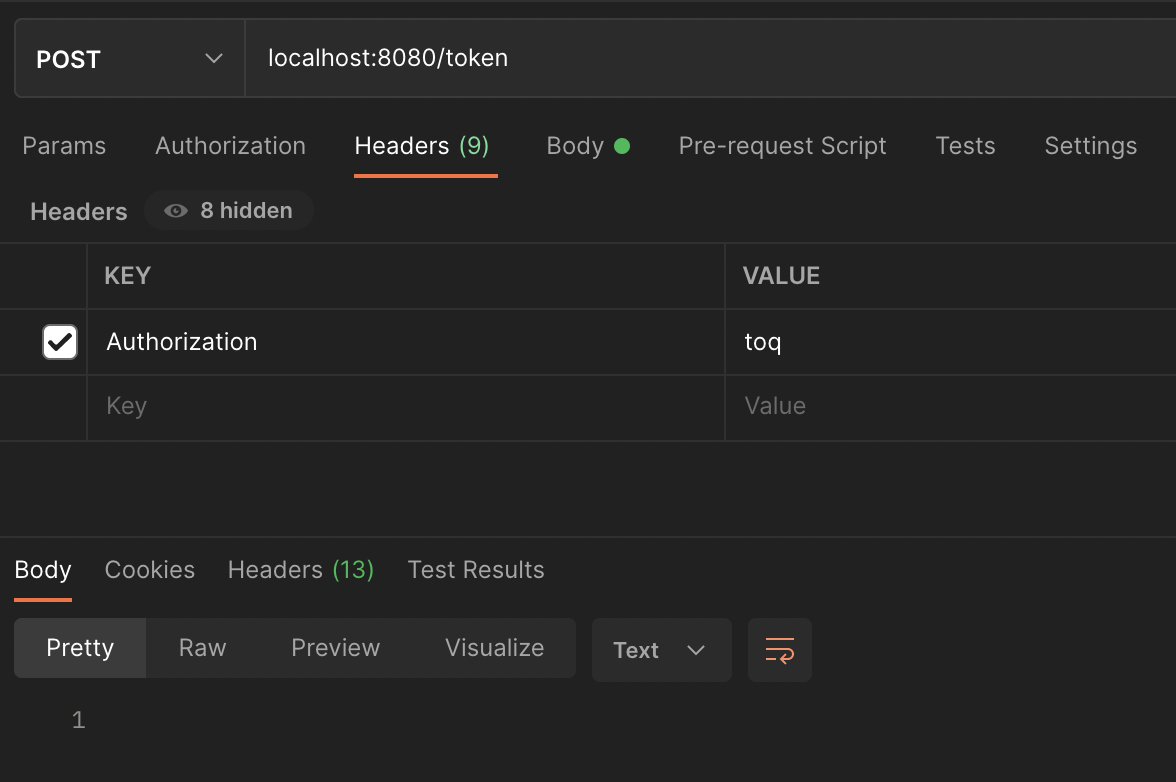

Authorization 이라는 이름을 가진 Key에 알맞은 token을 보냈을 때만 chain.doFilter() 를 실행하게 하고, 아닐 때는 예외를 날리든가, 사용자를 막든가 한다.
📌 Principal 생성
▸ PrincipalDetails.java
package com.jwtpractice.auth;

import com.jwtpractice.model.User;
import org.springframework.security.core.GrantedAuthority;
import org.springframework.security.core.userdetails.UserDetails;

import java.util.ArrayList;
import java.util.Collection;

public class PrincipalDetails implements UserDetails {
    private User user;

    public PrincipalDetails(User user) {
        this.user = user;
    }

    @Override
    public Collection<? extends GrantedAuthority> getAuthorities() {
        Collection<GrantedAuthority> authorities = new ArrayList<>();
        user.getRoleList().forEach(r->{
            authorities.add(()->r);
        });
        return authorities;
    }

    @Override
    public String getPassword() {
        return user.getPassword();
    }

    @Override
    public String getUsername() {
        return user.getUsername();
    }

    @Override
    public boolean isAccountNonExpired() {
        return true;
    }

    @Override
    public boolean isAccountNonLocked() {
        return true;
    }

    @Override
    public boolean isCredentialsNonExpired() {
        return true;
    }

    @Override
    public boolean isEnabled() {
        return true;
    }
}- UserDetails 상속받은 다음 implements
- getPassword() 랑, getUsername() user걸로 설정해주고, 나머지 값은 다 false에서 true로 변경
▸ PrincipalDetailsService.java
package com.jwtpractice.auth;

import com.jwtpractice.model.User;
import com.jwtpractice.model.UserRepository;
import lombok.RequiredArgsConstructor;
import org.springframework.security.core.userdetails.UserDetails;
import org.springframework.security.core.userdetails.UserDetailsService;
import org.springframework.security.core.userdetails.UsernameNotFoundException;
import org.springframework.stereotype.Service;

// http://localhost:8080/login
@Service
@RequiredArgsConstructor
public class PrincipalDetailsService implements UserDetailsService {
    private final UserRepository userRepository;
    @Override
    public UserDetails loadUserByUsername(String username) throws UsernameNotFoundException {
        System.out.println("principal detail");
        User user = userRepository.findByUsername(username);
        return new PrincipalDetails(user);
    }
}- 원래 /login 에 대한 출력을 여기서 하는데, 현재 securityConfig에서 formLogin()을 disable() 했기 때문에 동작을 하지 않는다.
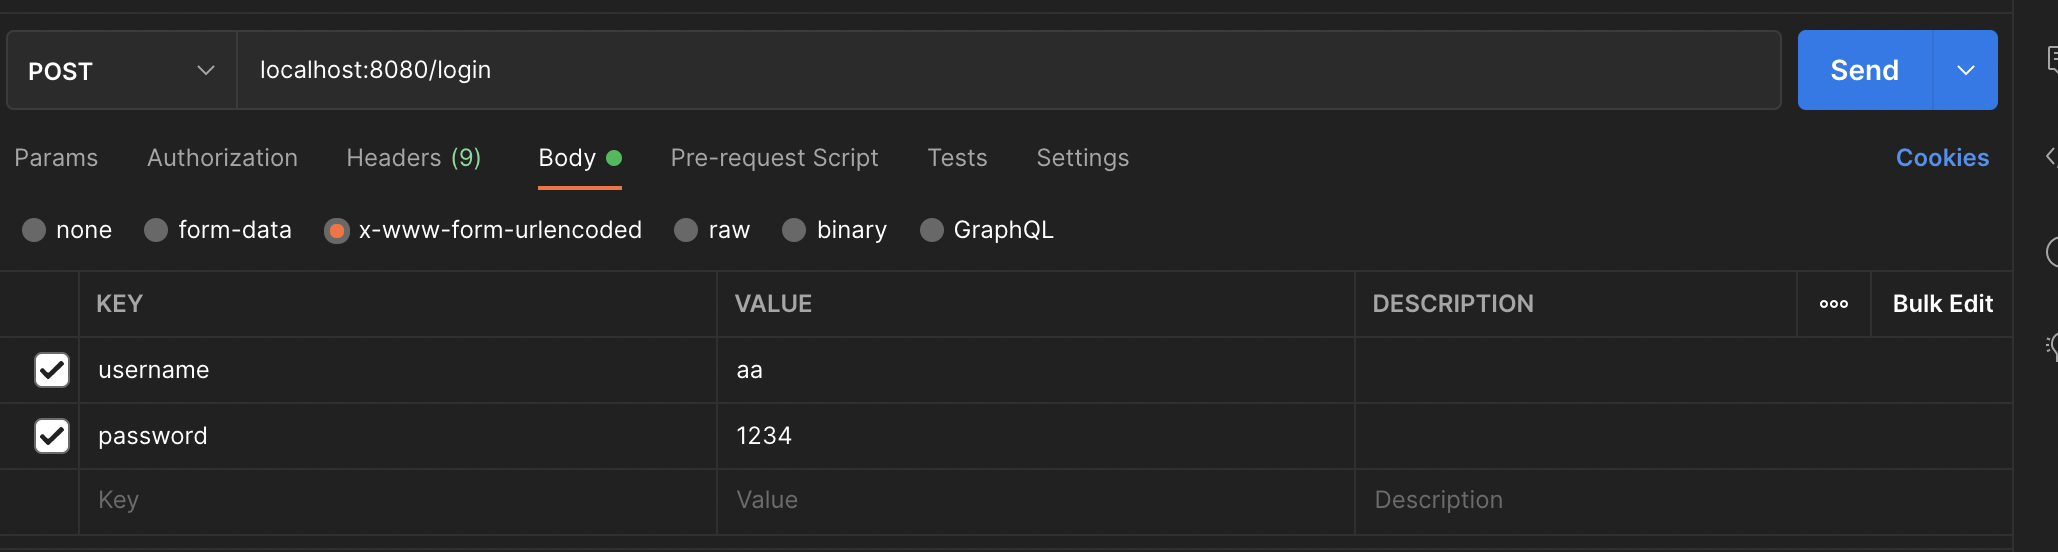
- SpringSecurity에 UsernamePasswordAuthenticationFilter가 있다.
- login 요청해서 username과 password를 post로 요청하면 해당 필터가 동작한다.
- (만약 formLogin()이 disable()이 아니라면)
▸ JwtAuthenticationFilter.java
package com.jwtpractice.jwt;

import org.springframework.security.web.authentication.UsernamePasswordAuthenticationFilter;

public class JwtAuthenticationFilter extends UsernamePasswordAuthenticationFilter {
}
▸ SecurityConfig.java
    protected void configure(HttpSecurity http) throws Exception {
        http.addFilterBefore(new MyFilter3(),BasicAuthenticationFilter.class);
        http.csrf().disable();
        http.sessionManagement().sessionCreationPolicy(SessionCreationPolicy.STATELESS)
                .and()
                .addFilter(corsFilter)
                .formLogin().disable()
                .httpBasic().disable()
                .addFilter(new JwtAuthenticationFilter(authenticationManager())) // <--- 이 부분 추가
                ...
}
로그인을 진행하는 Filter는 authenticationManager() 객체를 이용해서 로그인을 진행한다.
login 요청을 하면 로그인 시도를 위해서 실행되는 함수를 override해주어야 한다.
해당 함수는 attempAuthentication()이다.
▸ JwtAuthenticationFilter.java
package com.jwtpractice.jwt;
import lombok.RequiredArgsConstructor;
import org.springframework.security.authentication.AuthenticationManager;
import org.springframework.security.core.Authentication;
import org.springframework.security.core.AuthenticationException;
import org.springframework.security.web.authentication.UsernamePasswordAuthenticationFilter;
import javax.servlet.http.HttpServletRequest;
import javax.servlet.http.HttpServletResponse;
@RequiredArgsConstructor
public class JwtAuthenticationFilter extends UsernamePasswordAuthenticationFilter {
private final AuthenticationManager authenticationManager;
// login 요청을 하면 로그인 시도를 위해서 실행되는 함수
@Override
public Authentication attemptAuthentication(HttpServletRequest request, HttpServletResponse response) throws AuthenticationException {
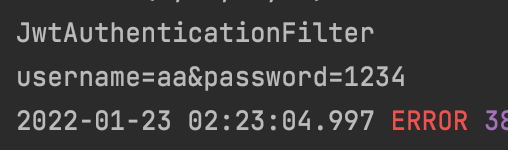
System.out.println("JwtAuthenticationFilter");
return super.attemptAuthentication(request, response);
}
}위의 attempAuthentication() 에서 할 일은 다음과 같다.
- 1. request로부터 username, password를 받아온다.
- 2. 정상인지 로그인 시도를 해본다.
- authenticationManager로 로그인 시도를 해보면, PrincipalDetailService가 호출된다.
- PrincipalDetailService가 호출되는 이유는 UserDetailService를 상속받고 있기 때문이다.
- UserDetailService로 부터 상속받은 loadUserByUsername() 메서드가 실행된다.
- 3. PrincipalDetails를 세션에 담는다.
- 세션에 담는 이유는 권한 체크를 하기 위함이다.
- SecurityConfig에 있는 권한 체크를 이용하려면 해당 PrincipalDetails를 세션에 담아야 한다.
- 4. JWT 토큰을 만들어서 반환해준다.
📌 회원 가입
▸ RestApiController.java
@RestController
@RequiredArgsConstructor
public class RestApiController {
    private final BCryptPasswordEncoder bCryptPasswordEncoder;
    private final UserRepository userRepository;

    @GetMapping("/home")
    public String home(){
        return "<h1>home</h1>";
    }

    @PostMapping("token")
    public String token(){
        return "<h1>token</h1>";
    }

    @PostMapping("/join")
    public String join(@RequestBody User user){
        user.setPassword(bCryptPasswordEncoder.encode(user.getPassword()));
        user.setRoles("ROLE_USER");
        userRepository.save(user);
        return "회원 가입 완료";
    }
}
▸ @SpringBootApplication 위치에 Bcrypt 생성자 추가
@SpringBootApplication
public class JwtpracticeApplication {
	@Bean
	public BCryptPasswordEncoder passwordEncoder(){
		return new BCryptPasswordEncoder();
	};
	public static void main(String[] args) {
		SpringApplication.run(JwtpracticeApplication.class, args);
	}

}
📌 로그인
▸ JwtAuthenticationFilter.java
@RequiredArgsConstructor
public class JwtAuthenticationFilter extends UsernamePasswordAuthenticationFilter {
private final AuthenticationManager authenticationManager;
// login 요청을 하면 로그인 시도를 위해서 실행되는 함수
@Override
public Authentication attemptAuthentication(HttpServletRequest request, HttpServletResponse response) throws AuthenticationException {
System.out.println("JwtAuthenticationFilter");
try{
BufferedReader br = request.getReader();
String input = null;
while((input = br.readLine()) !=null) System.out.println(input);
}catch (IOException e){
e.printStackTrace();
}
return super.attemptAuthentication(request, response);
}
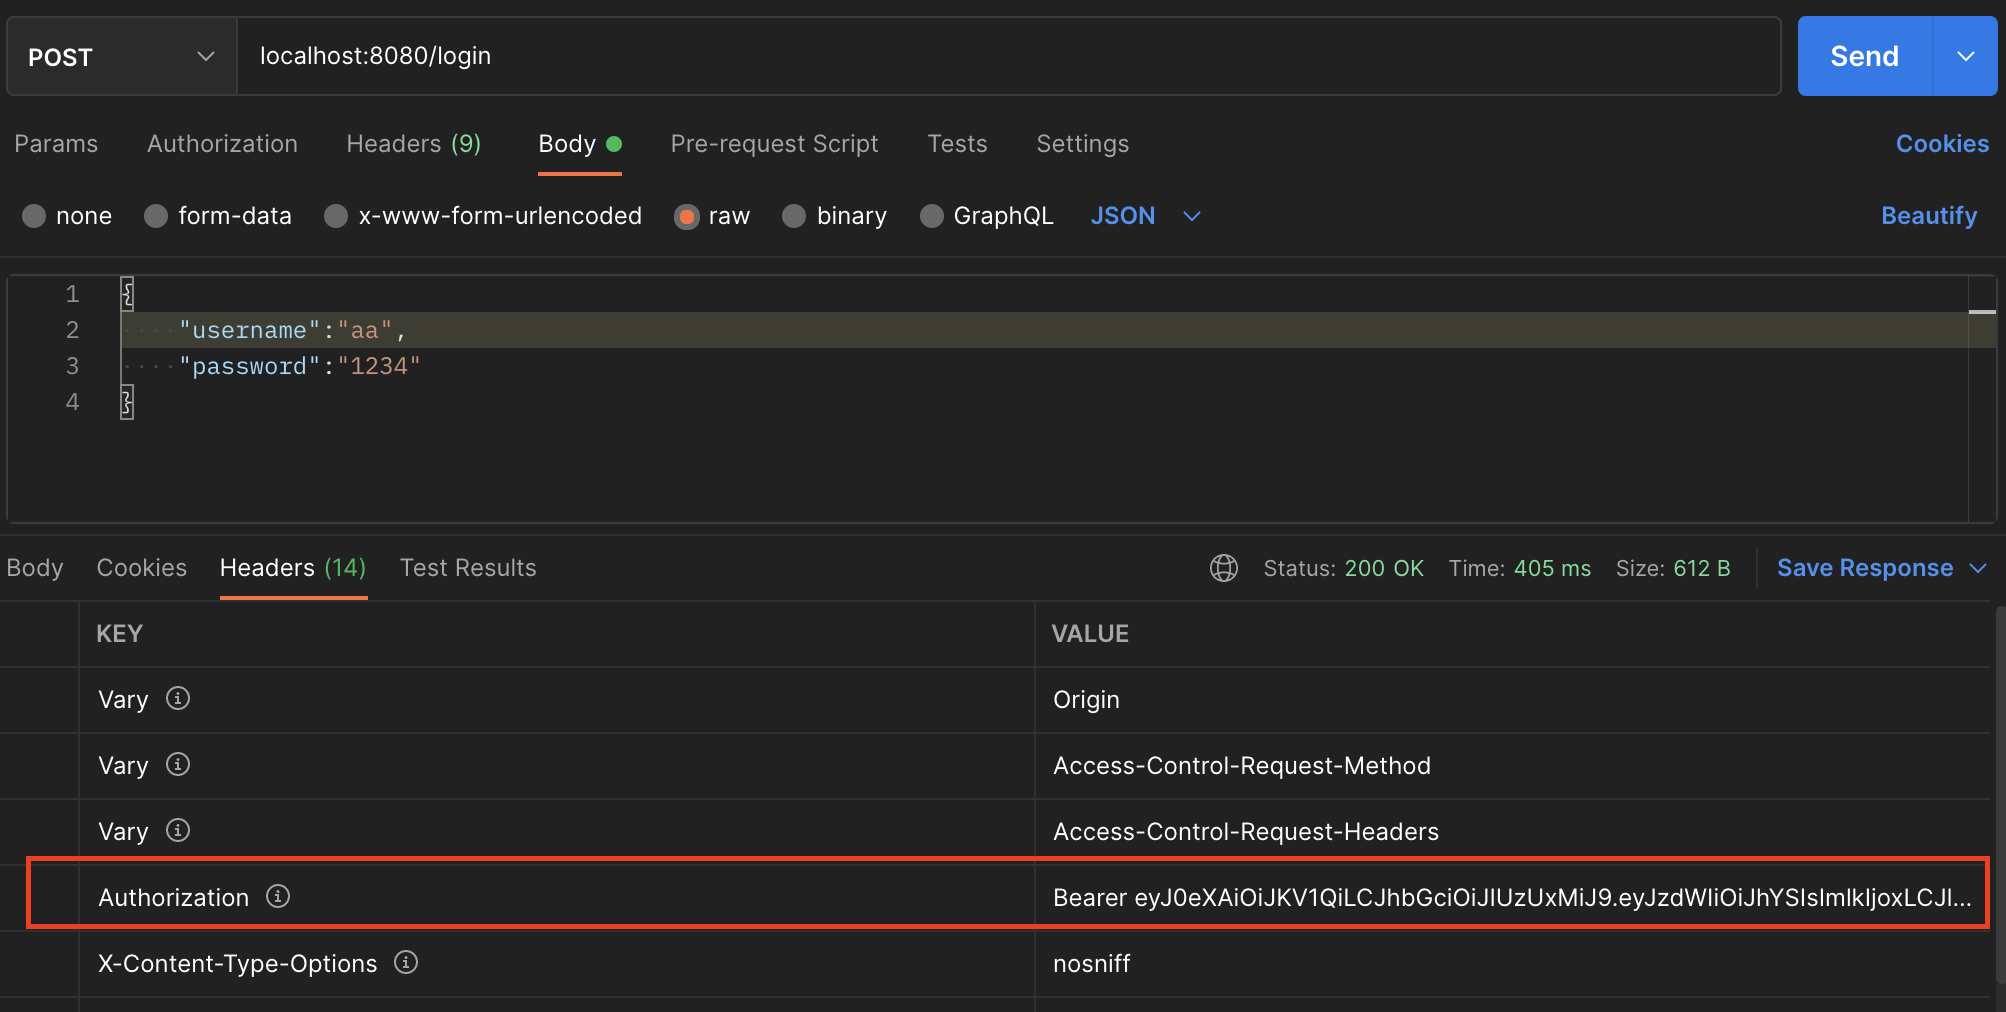
}로그인을 해서 한번 request값을 찍어보자.

▸ json 파싱하기
import com.fasterxml.jackson.databind.ObjectMapper;

...

ObjectMapper om = new ObjectMapper();
User user = om.readValue(request.getInputStream(), User.class);
System.out.println(user);
▸ JwtAuthenticationFilter.java
@RequiredArgsConstructor
public class JwtAuthenticationFilter extends UsernamePasswordAuthenticationFilter {
    private final AuthenticationManager authenticationManager;
    // login 요청을 하면 로그인 시도를 위해서 실행되는 함수
    @Override
    public Authentication attemptAuthentication(HttpServletRequest request, HttpServletResponse response) throws AuthenticationException {
        System.out.println("JwtAuthenticationFilter");
        try{
            ObjectMapper om = new ObjectMapper();
            User user = om.readValue(request.getInputStream(), User.class);
            System.out.println(user);

            UsernamePasswordAuthenticationToken authenticationToken =
                    new UsernamePasswordAuthenticationToken(user.getUsername(),user.getPassword());

            Authentication authentication =
                    authenticationManager.authenticate(authenticationToken);

            PrincipalDetails principalDetails = (PrincipalDetails) authentication.getPrincipal();
            System.out.println(principalDetails.getUser().getUsername());

            return authentication;
        }catch (IOException e){
            e.printStackTrace();
        }
        return null;
    }

    @Override
    protected void successfulAuthentication(HttpServletRequest request, HttpServletResponse response, FilterChain chain, Authentication authResult) throws IOException, ServletException {
        System.out.println("JwtAuthenticationFilter.successfulAuthentication");
        super.successfulAuthentication(request, response, chain, authResult);
    }
}- ObjectMapper로 json 데이터를 parsing 할 수 있다.
- 토큰을 만들어서 manager에게 넘겨준다.
- authenticationManger.authenticate() 가 실행되면 principalDetailService의 loadUserByUsername() 이 실행된다.
- username은 가져와서 비교하고, password는 security가 내부 로직으로 돌려서 확인한다.
- 인증이 성공하면 authentication에서 principal을 가져올 수 있다.
- 인증이 성공하지 못하면 다음 단계로 나아가지 못한다.
- attemptAuthentication()이 실행된 이후 성공적으로 로그인이 됐다면, successfulAuthentication() 이 실행된다.
- 여기 함수에서 jwt를 만들어서 반환해주면 된다.
📌 jwt 토큰 만들어서 응답해주기
@Override
protected void successfulAuthentication(HttpServletRequest request, HttpServletResponse response, FilterChain chain, Authentication authResult) throws IOException, ServletException {
    PrincipalDetails principalDetails = (PrincipalDetails) authResult.getPrincipal();

    String jwtToken = JWT.create()
            .withSubject(principalDetails.getUsername())
            // 기준 1/1000 초 - 1000 = 1초 60000 = 1분
            .withExpiresAt(new Date(System.currentTimeMillis() + JwtProperties.EXPIRATION_TIME))
            .withClaim("id",principalDetails.getUser().getId())
            .withClaim("username",principalDetails.getUser().getUsername())
            .sign(Algorithm.HMAC512(JwtProperties.SECRET));

    response.addHeader("Authorization","Bearer " + jwtToken);
}- 코드는 어렵지 않다.
- authentication 객체를 이용해서 해당 인증된 유저 정보를 가져온다.
- build.gradle 등록했던 JWT libraray를 이용해 JWT 토큰을 생성한다.
- implementation group: 'com.auth0', name: 'java-jwt', version: '3.18.2'
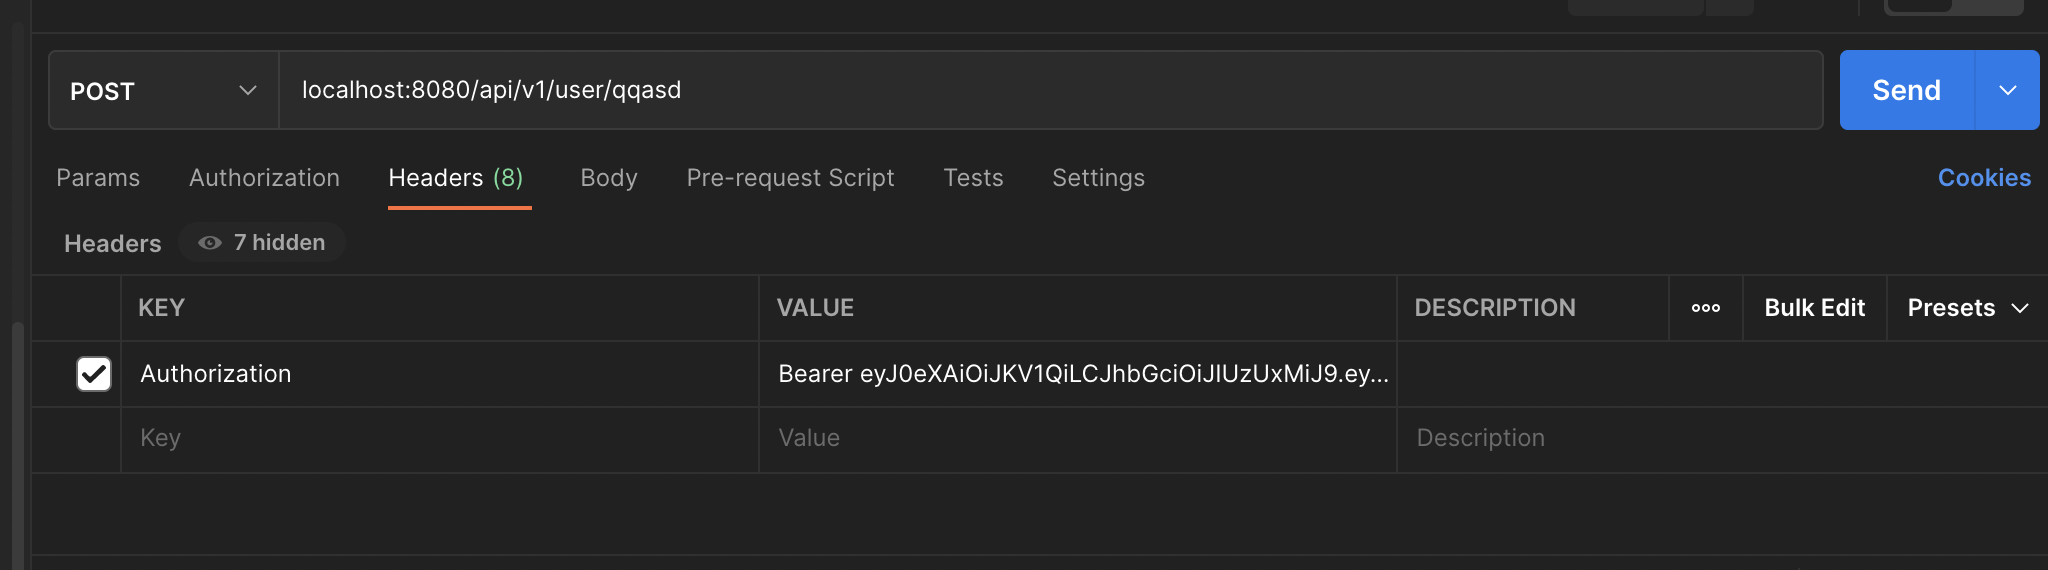
📌 JWT token 사용자한테 받고 인증처리
▸ JwtAuthorizationFilter.java
public class JwtAuthorizationFilter extends BasicAuthenticationFilter {
    public JwtAuthorizationFilter(AuthenticationManager authenticationManager) {
        super(authenticationManager);
        System.out.println("인증이나 권한이 필요한 주소 요청됨.");
    }
}- 해당 필터를 SecurityConfig에 추가해주자.
▸ SecurityConfig.java
    protected void configure(HttpSecurity http) throws Exception {
        http.addFilterBefore(new MyFilter3(),BasicAuthenticationFilter.class); // <-- 이 부분 추가
        http.csrf().disable();
        http.sessionManagement().sessionCreationPolicy(SessionCreationPolicy.STATELESS)
                .and()
                .addFilter(corsFilter)
                .formLogin().disable()
                .httpBasic().disable()
                .addFilter(new JwtAuthenticationFilter(authenticationManager()))
                .addFilter(new JwtAuthorizationFilter(authenticationManager())) <-- 이 부분 추가
                ...
}- Security Filter중 BasicAuthenticationFilter가 있다.
- 권한이나 인증이 필요한 특정 주소를 요청하면 무조건 위 필터를 타게 돼있다.
- 만약에 권한이나 인증이 필요하지 않은 주소라면 해당 필터를 타지 않는다.
- 인증이 필요한 주소에 대하여 BasicAuthenticationFilter에서 doFilterInternal() 함수가 호출된다.
▸ JwtAuthenticationFilter.java
public class JwtAuthorizationFilter extends BasicAuthenticationFilter {
    public JwtAuthorizationFilter(AuthenticationManager authenticationManager) {
        super(authenticationManager);
    }

    @Override
    protected void doFilterInternal(HttpServletRequest request, HttpServletResponse response, FilterChain chain) throws IOException, ServletException {
        super.doFilterInternal(request, response, chain);

        String jwtHeader = request.getHeader("Authorization");
        System.out.println("jwtHeader = " + jwtHeader);
    }
}

▸ JwtAuthenticationFilter.java
@RequiredArgsConstructor
public class JwtAuthenticationFilter extends UsernamePasswordAuthenticationFilter {
    private final AuthenticationManager authenticationManager;
    // login 요청을 하면 로그인 시도를 위해서 실행되는 함수
    @Override
    public Authentication attemptAuthentication(HttpServletRequest request, HttpServletResponse response) throws AuthenticationException {
        System.out.println("JwtAuthenticationFilter");
        try{
            ObjectMapper om = new ObjectMapper();
            User user = om.readValue(request.getInputStream(), User.class);
            System.out.println(user);

            UsernamePasswordAuthenticationToken authenticationToken =
                    new UsernamePasswordAuthenticationToken(user.getUsername(),user.getPassword());

            // PrincipalDetailsService 의 loadUserByUsername() 함수가 실행된 후 정상이면 authentication 이 return 된다.
            // DB 에 있는 username 과 password 가 일치하다는 뜻
            Authentication authentication =
                    authenticationManager.authenticate(authenticationToken);

            // authentication 객체가 session 영역에 저장된다. --> 로그인이 됐다는 뜻이다.
            PrincipalDetails principalDetails = (PrincipalDetails) authentication.getPrincipal();
            System.out.println(principalDetails.getUser().getUsername());

            // return 이유 : 권한 관리를 security 가 대신 해주기 때문에 편하려고 하는 것
            // 굳이 JWT 토큰을 사용하면서 세션을 만들 이유는 없다.
            return authentication;
        }catch (IOException e){
            e.printStackTrace();
        }
        return null;
    }

    // attemptAuthentication 실행 후 인증이 정상적으로 됐으면 아래 함수가 실행
    // JWT 토큰을 만들어서 request 요청한 사용자에게 jwt 토큰을 response 해주면 된다.
    @Override
    protected void successfulAuthentication(HttpServletRequest request, HttpServletResponse response, FilterChain chain, Authentication authResult) throws IOException, ServletException {
        PrincipalDetails principalDetails = (PrincipalDetails) authResult.getPrincipal();

        String jwtToken = JWT.create()
                .withSubject(principalDetails.getUsername())
                // 기준 1/1000 초 - 1000 = 1초 60000 = 1분
                .withExpiresAt(new Date(System.currentTimeMillis() + JwtProperties.EXPIRATION_TIME))
                .withClaim("id",principalDetails.getUser().getId())
                .withClaim("username",principalDetails.getUser().getUsername())
                .sign(Algorithm.HMAC512(JwtProperties.SECRET));

        response.addHeader("Authorization","Bearer " + jwtToken);
    }
}
▸ JwtProperites.java
public class JwtProperties {
    static String SECRET = "임얼쑤"; // 우리 서버만 알고 있는 비밀값
    static int EXPIRATION_TIME = 864000000; // 10일 (1/1000초)
    static String TOKEN_PREFIX = "Bearer ";
    static String HEADER_STRING = "Authorization";
}
▸ JwtAuthorizationFilter.java
public class JwtAuthorizationFilter extends BasicAuthenticationFilter {
    private final UserRepository userRepository;
    public JwtAuthorizationFilter(AuthenticationManager authenticationManager, UserRepository userRepository) {
        super(authenticationManager);
        this.userRepository =userRepository;
    }

    @Override
    protected void doFilterInternal(HttpServletRequest request, HttpServletResponse response, FilterChain chain) throws IOException, ServletException {
        // super 를 안 지우면 응답이 2번 된다.
        //        super.doFilterInternal(request, response, chain);
        String jwtHeader = request.getHeader("Authorization");

        if(jwtHeader == null || !jwtHeader.startsWith("Bearer")){
            chain.doFilter(request,response);
            return ;
        }

        String jwtToken = request.getHeader("Authorization").replace("Bearer ","");
        String username = JWT.require(Algorithm.HMAC512(JwtProperties.SECRET)).build().verify(jwtToken).getClaim("username").asString();
        if(username == null) {
            chain.doFilter(request,response);
            return ;
        }
        System.out.println(username);
        User userEntity = userRepository.findByUsername(username);
        System.out.println("userEntity : " + userEntity.getUsername());

        PrincipalDetails principalDetails = new PrincipalDetails(userEntity);

        // Jwt 토큰 서명을 통해서 서명이 정상이면 Authentication 객체를 만들어준다.
        Authentication authentication = new UsernamePasswordAuthenticationToken(principalDetails,null,principalDetails.getAuthorities());

        // 강제로 시큐리티 세션에 접근하여 Authentication 객체를 저장한다.
        SecurityContextHolder.getContext().setAuthentication(authentication);
    }
}
해당 강좌 github
https://github.com/codingspecialist/Springboot-Security-JWT-Easy
'스프링 & Jpa > 📌Spring Security 강좌' 카테고리의 다른 글
| 인프런 시큐리티 강좌 #2 - security 기본 (0) | 2022.01.21 |
|---|---|
| 인프런 시큐리티 강좌 #1 - 도입 (0) | 2022.01.19 |


댓글